
Kodimaram installation is the stage where months of craftsmanship finally rise into place in front of the shrine. It is a technical job, because a tall metal-clad flagstaff must stand perfectly vertical and secure, and it is a sacred one, because it leads directly into the dhwaja prathishta. This step-by-step guide explains how a kodimaram installation is planned and carried out, what the temple committee needs to prepare, and how to make sure the work is safe, accurate and on time.
Kerala Metal Art has been crafting and installing kodimarams for temples and churches since 2004. Our own team carries out every installation, so the advice below comes directly from work on real sites.
In this guide
Before the Kodimaram Installation Begins
A smooth kodimaram installation is decided long before anyone climbs the scaffolding. Three things must be in place first: the tantri’s instructions, a fixed muhurtham, and a flagstaff that has been crafted to the correct measurements.
The tantri fixes the position, alignment and height of the kodimaram according to the temple’s traditions. These details guide everything that follows, from the base to the vahanam at the top. The dhvajastambha is a consecrated structure, so the installation schedule is built around the ritual calendar rather than the other way round.
The team behind a kodimaram installation
Several people share responsibility for a successful installation. The tantri guides the rituals and approves the position. The temple committee coordinates permissions, access and the ceremony. A civil engineer, where needed, designs the foundation. The installation team, ideally the same craftsmen who made the sections, handles lifting, alignment, fitting and finishing. When everyone understands their role from the start, decisions are quick and the work moves steadily.
We recommend a short meeting with all of these people before the work begins. Agree the schedule, the daily working hours, the safe zone around the site and who will take decisions if something unexpected comes up. This single meeting prevents many misunderstandings later.
The craftsmen, for their part, must have finished, inspected and numbered every section before transport. If you are still choosing who will make your flagstaff, read our guide on choosing a kodimaram manufacturer in Kerala first.
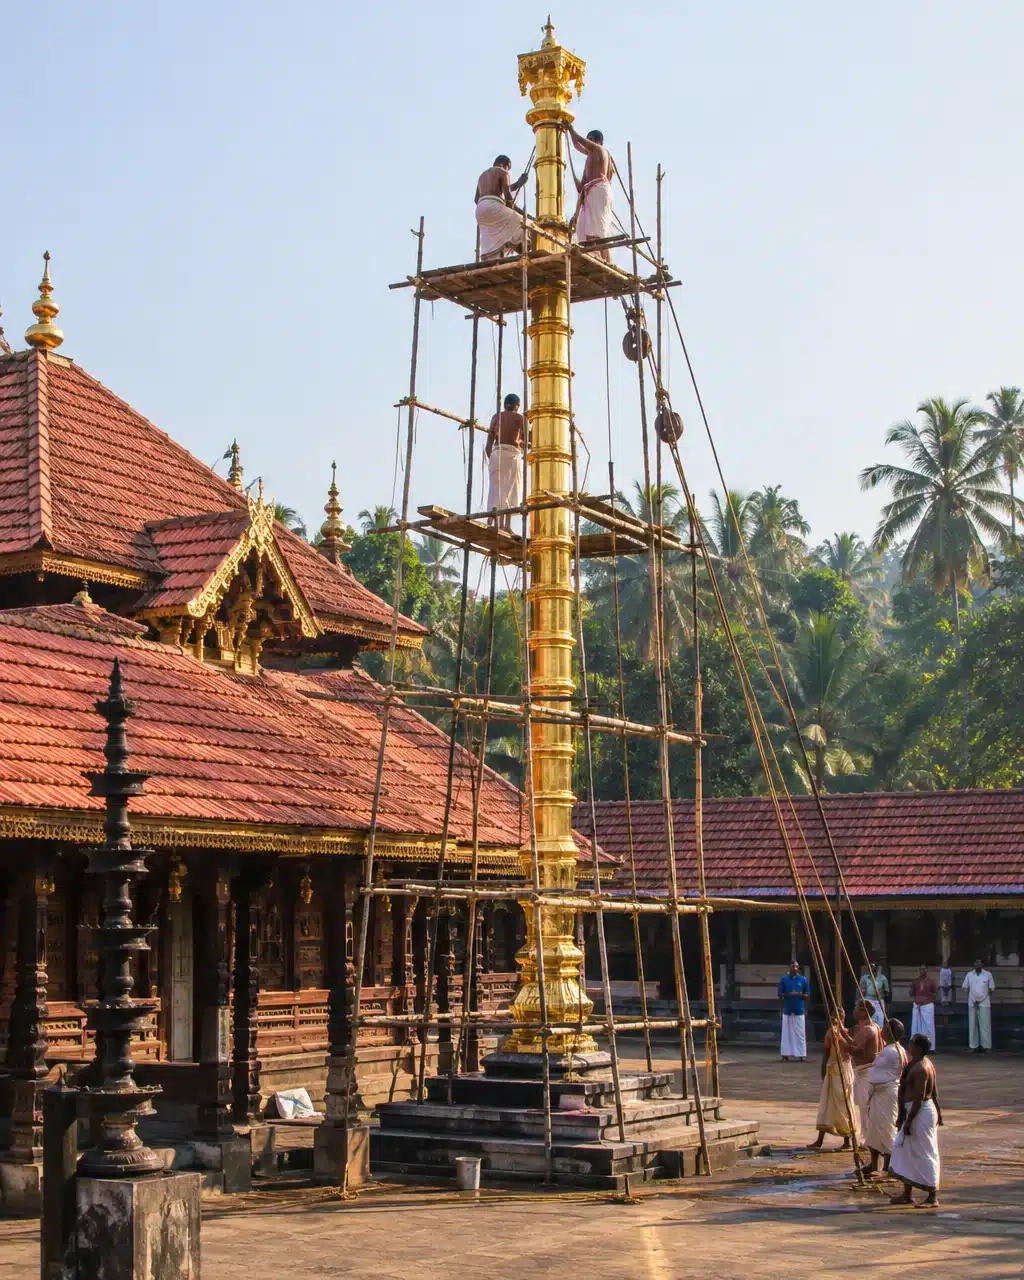
Kodimaram Installation Step by Step
Every temple and church site is different, but a careful kodimaram installation generally follows the sequence below. Some steps run in parallel, and the tantri may add ritual stages at particular points.
Step 1: Confirm the muhurtham and plan backwards
The date of the dhwaja prathishta is the fixed point of the project. We plan every stage backwards from it, leaving a comfortable margin for weather, transport and final cleaning. A kodimaram installation that finishes days before the ceremony allows the temple to prepare calmly.
Step 2: Survey the site and mark the axis
Our team visits the site to check the exact position given by the tantri, the line of the sanctum, the ground conditions and the access for vehicles and scaffolding. The centre point and axis are marked clearly and checked again before any construction begins.
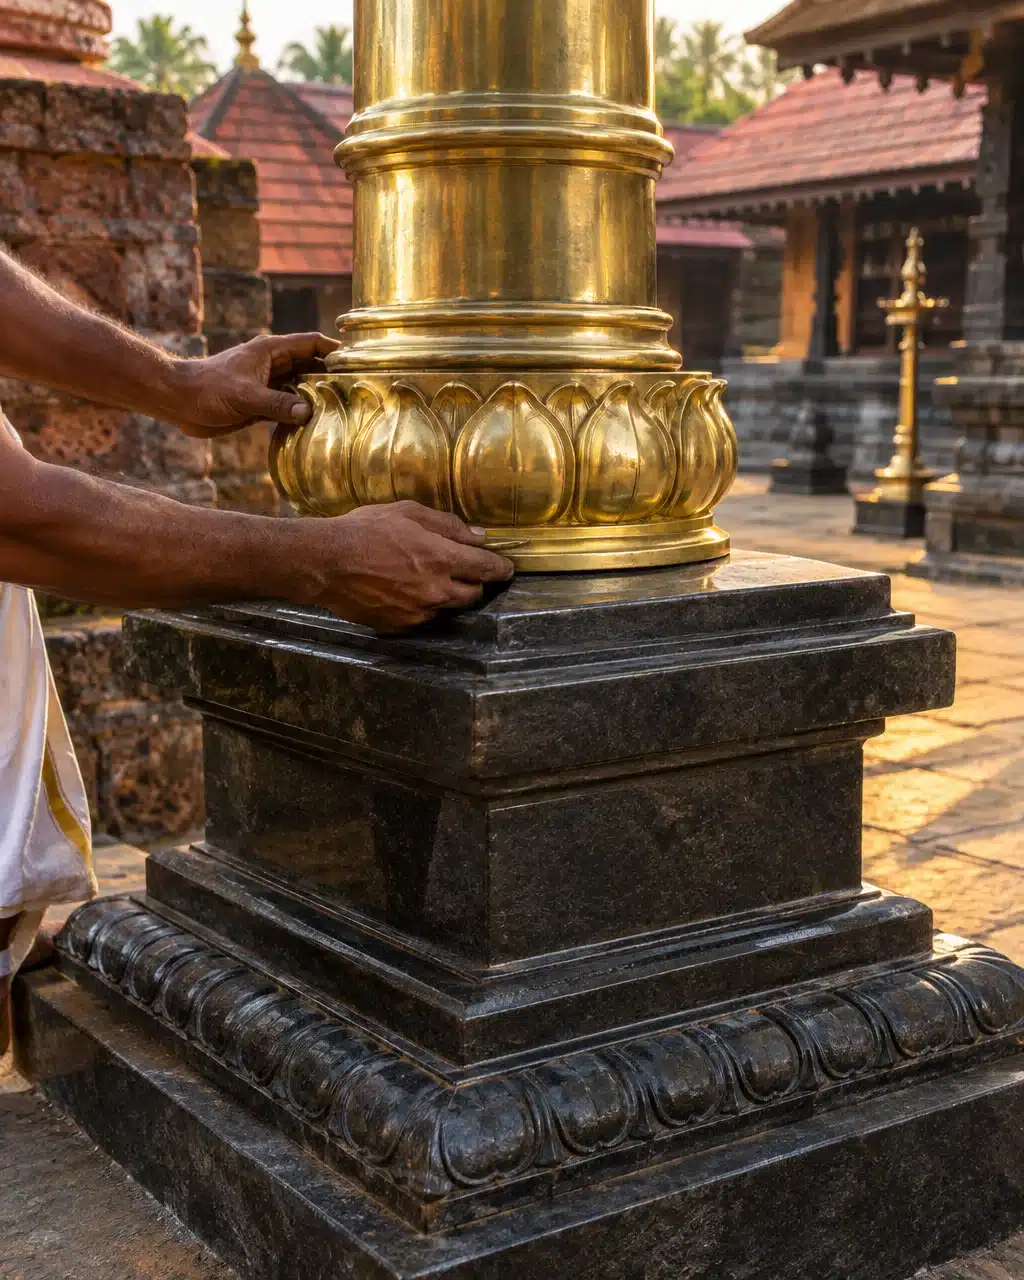
Step 3: Prepare the foundation and the peedam
The base must carry a tall structure safely for decades, so the foundation should be designed for the soil and the height of the kodimaram. Where needed, the committee should involve a qualified civil engineer. The granite peedam, often with lotus mouldings, is completed and allowed to set properly before the core is raised.
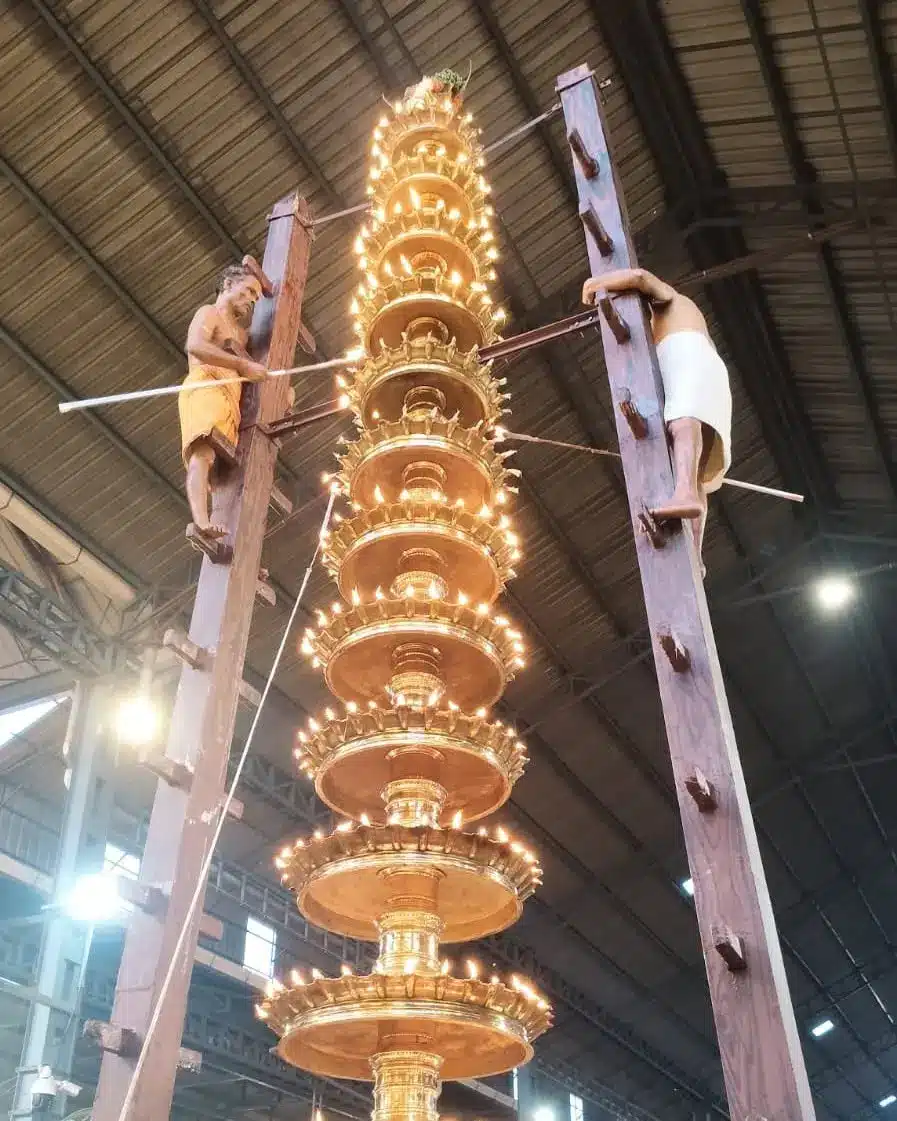
Step 4: Prepare the timber core
The core is traditionally a single, straight, well-seasoned tree trunk. It is shaped to the required profile, treated to protect it from moisture and insects, and inspected for cracks. Many temples follow special rituals when the tree is selected and brought to the temple, and the tantri guides these customs.
Step 5: Transport and store the sections safely
The finished metal sections, vahanam and fittings are packed and transported carefully. On site they need a clean, dry and secure storage space close to the installation area. Each section is numbered, so the team can fit them in the correct order without confusion.
Step 6: Erect scaffolding and lifting arrangements
Strong, stable scaffolding is essential for a safe kodimaram installation. Depending on the height and the site, the core may be raised with lifting equipment, traditional methods or a combination of both. The area around the work is cordoned off to keep devotees at a safe distance.
Step 7: Raise and align the core
The core is lifted into position on the base and set exactly vertical. Alignment is checked repeatedly from different directions with plumb lines and levelling tools, because even a small lean becomes obvious on a tall flagstaff. Only when the core is perfectly true is it fixed permanently.
Step 8: Fit the base cover and the para sections
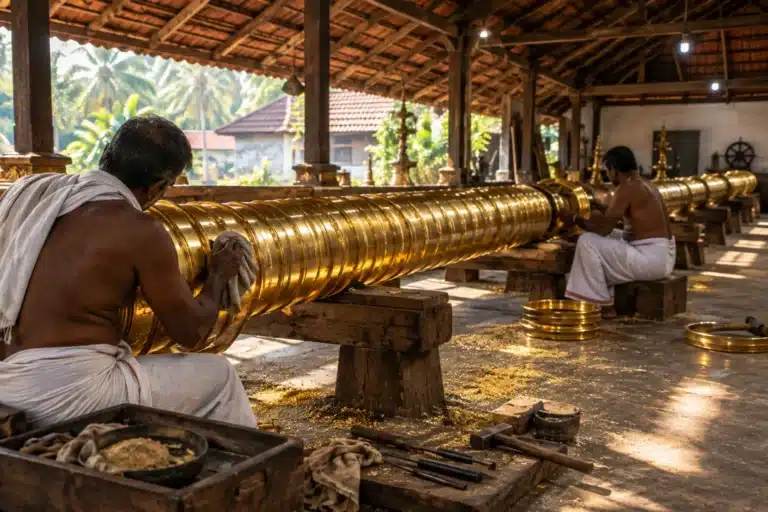
The metal covering is fitted from the bottom upwards. The base cover goes on first, followed by the para sections one after another. The craftsmen check the joints, the bands and the line of the decoration at every level, so that the patterns run straight and the joints sit tight.
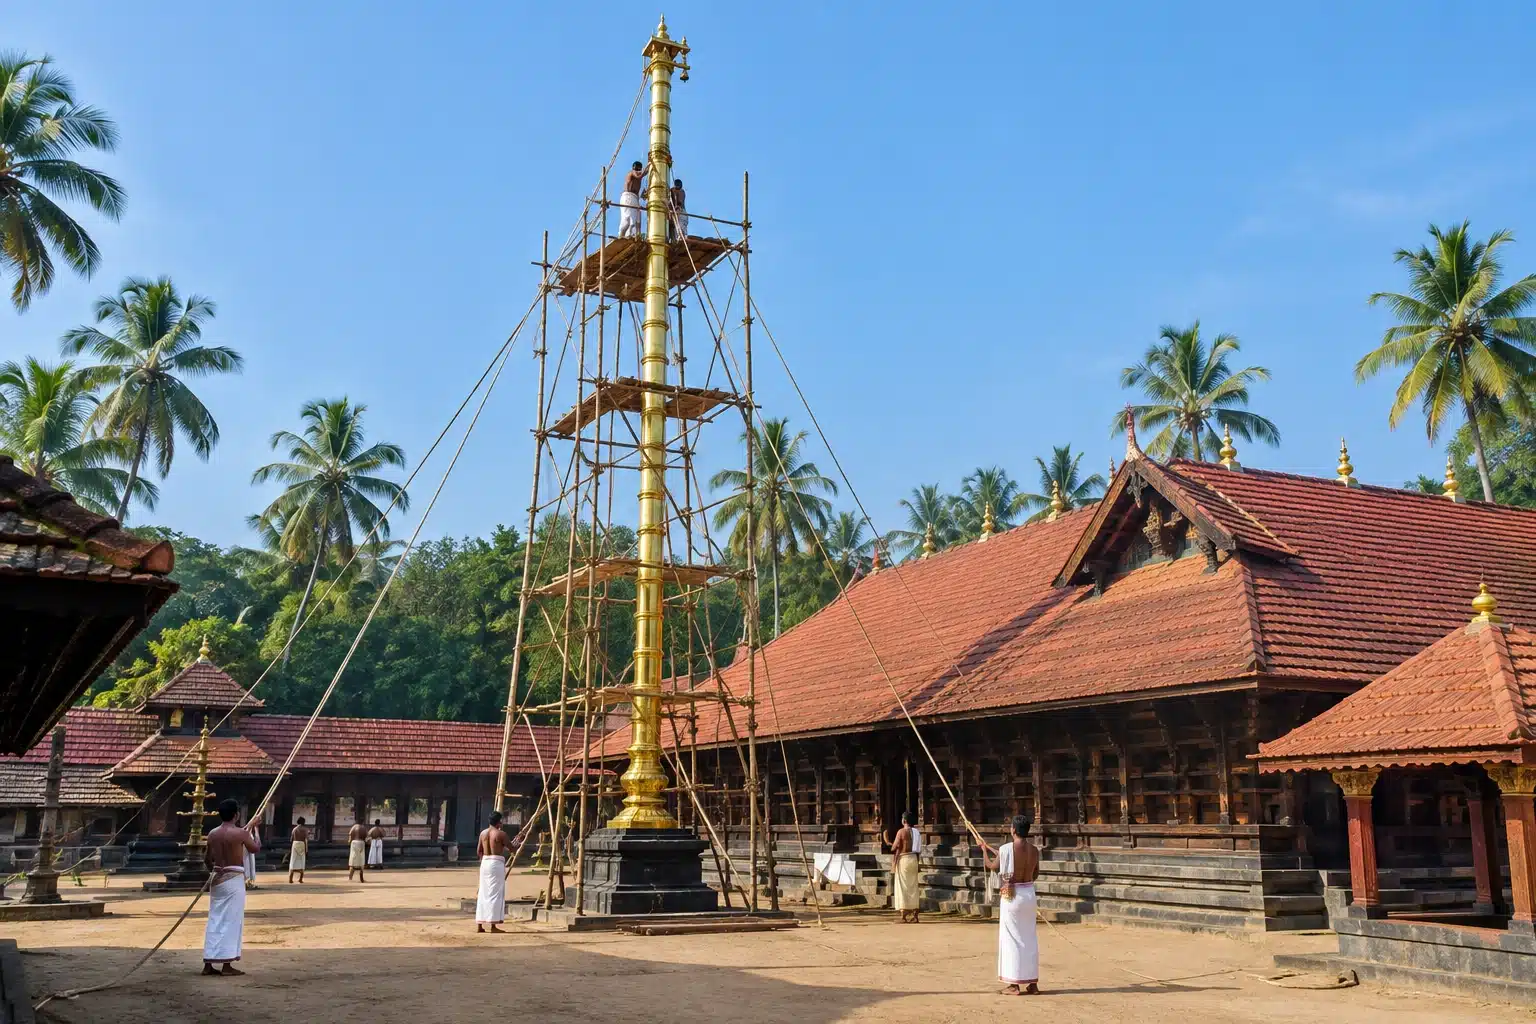
Step 9: Fix the upper tiers, bells and vahanam
Near the top, the team fits the upper tiers and bells, and finally the vahanam or emblem. These parts are fixed securely, because they are exposed to strong winds and must remain safe for many years. The flag rope and pulley arrangement for the kodiyettam are also installed and tested at this stage.
Step 10: Final checks, cleaning and polishing
Once every part is in place, the whole kodimaram is inspected from top to bottom. Fixings are tightened, alignment is confirmed one last time, and every surface is cleaned and polished. Scaffolding is then removed carefully so that the finish is not scratched.
Step 11: Dhwaja prathishta and handover
The tantri performs the dhwaja prathishta at the chosen muhurtham, consecrating the new flagstaff. After the ceremony we hand over the kodimaram to the committee and explain how to care for it.
Safety During Kodimaram Installation
Working at height around a heavy structure carries real risks, and safety must never be compromised for speed. A responsible team plans for it from the first day.
- Use strong, properly braced scaffolding, inspected before work starts each day.
- Provide safety harnesses and helmets for everyone working at height.
- Keep devotees, children and visitors outside a clearly marked safe zone.
- Pause lifting and work at height during heavy rain or strong winds.
- Check that lifting equipment is rated for the load and operated by experienced people.
- Discuss earthing and lightning protection for the finished kodimaram with a qualified engineer.
What the Temple Committee Should Prepare
The committee plays an important part in a successful kodimaram installation. These simple preparations make a big difference to the speed and quality of the work.
- Written instructions: the tantri’s measurements, position and vahanam details.
- Access: a clear route for vehicles and space for unloading.
- Storage: a secure, dry room near the site for the metal sections.
- Utilities: water and electricity for tools and cleaning.
- Permissions: any approvals required from the devaswom board or local authorities.
- A single coordinator: one person who can take decisions quickly during the work.
- Festival planning: arrangements for the prathishta that do not crowd the work area before it is finished.
Common Kodimaram Installation Problems and How to Avoid Them
Most difficulties during a kodimaram installation come from a few avoidable causes. Knowing them in advance helps the committee and the craftsmen prevent them.
A flagstaff that is not perfectly vertical
This usually comes from an uneven base or rushed alignment. The answer is careful foundation work and repeated checks before the core is fixed permanently.
Gaps or uneven joints between sections
When sections are made by one team and installed by another, small differences in fit can appear. A maker who installs their own work avoids this, because the same craftsmen who shaped the sections fit them on site.
Damage during transport or storage
Dents and scratches often happen after the work leaves the workshop. Proper packing, careful handling and secure storage on site protect the finish.
Delays close to the ceremony
Late drawing approvals, timber delays and bad weather can squeeze the final weeks. A realistic schedule with a buffer before the muhurtham is the best protection.
Choosing the Right Season for Kodimaram Installation
Kerala’s weather has a real effect on a kodimaram installation. The heavy south-west monsoon, usually from June to September, and the north-east rains later in the year bring wet ground, slippery scaffolding and sudden strong winds. Work at height becomes slower and riskier, and freshly treated timber and newly finished metal need extra protection.
Where the tantri’s muhurtham allows a choice, many committees prefer to complete the kodimaram installation in the drier months. When the ceremony must fall during the rains, the team plans for it: covered storage for the sections, temporary shelters over the work area, extra time in the schedule and a strict rule to stop work at height in bad weather.
Heat matters too. In the hottest weeks, metal surfaces exposed to the sun become very hot to handle, so the team may start early in the morning and pause in the afternoon. Planning around the season protects both the craftsmen and the finish of the kodimaram.
Kodimaram Installation at Churches
Kerala churches also have a strong flagstaff tradition, and a church kodimaram installation follows many of the same technical steps: a sound foundation, a carefully aligned core, metal sections fitted from the bottom upwards and a secure emblem at the top, which is usually a cross. The difference lies in the ceremonies and in who guides them.
For a church, the parish priest and the parish committee decide the design, the position in front of the church and the date of the blessing. The kodimaram installation is usually completed before the perunnal, so that the feast can begin with the flag hoisting on the new flagstaff. You can read more in our guide to the church kodimaram.
Handover Checklist After Kodimaram Installation
Before the scaffolding comes down and the team leaves the site, the committee and the craftsmen should walk through a short handover checklist together. It confirms that the kodimaram installation is truly complete and gives the temple a clear record for the future.
- Alignment: the flagstaff is confirmed vertical from at least two directions.
- Sections and joints: every section is fixed, joints are tight and the decorative lines run straight.
- Top fittings: the vahanam or emblem, bells and upper tiers are secure.
- Flag system: the rope and pulley have been tested with a trial hoist.
- Finish: all surfaces are clean, polished and free of scratches from the work.
- Site: the area around the base is cleared and restored for devotees.
- Records: the committee receives the drawings, materials, date of kodimaram installation and care instructions.
We also recommend photographing the finished flagstaff from all four sides, close up and at full height, on the day of handover. These photographs become a useful reference when the temple plans polishing, inspections or any future work, and they show clearly how the kodimaram installation looked when it was completed.
Taking an hour for this walk-through prevents small issues from being discovered only during the festival, when the whole community is watching and repairs are far more difficult to arrange.
Replacing an Existing Kodimaram
When an old flagstaff has to be replaced, the kodimaram installation includes an extra stage: carefully removing the existing structure. The tantri guides the rituals that accompany this. Technically, the old metal sections are removed from the top downwards, the core is lowered safely, and the base is inspected and repaired or rebuilt before the new kodimaram is installed.
In some cases the old metal can be cleaned and kept by the temple, and an inspection may show that renovation rather than full replacement is possible. We always assess the existing kodimaram honestly before recommending the next step.
After the Prathishta: Caring for Your Kodimaram
A successful kodimaram installation is the beginning of a long life for the flagstaff. Regular care keeps it safe and beautiful through every festival season.
- Clean the metal gently and regularly to remove dust, soot and bird droppings.
- Arrange professional polishing works at intervals to restore the shine of brass and copper.
- Inspect the flag rope, pulley and upper fittings before every utsavam.
- Watch for signs of moisture or damage near the base and in the timber core.
- Keep a record of the installation date, materials and every maintenance visit.
To learn more about the meaning, parts and materials of the flagstaff itself, read our temple kodimaram guide. For church projects, see our article on the church kodimaram, and for a comparison of metals, read brass vs bronze kodimaram.
Why committees trust Kerala Metal Art with kodimaram installation
- We craft and install every kodimaram with our own team, since 2004.
- Installations are planned around the tantri’s instructions and the muhurtham.
- Safe scaffolding, careful alignment and a complete final clean are part of every job.
- Brass, copper and gold-covered kodimarams for temples and churches.
- Polishing and inspection support after the prathishta.
See our completed projects in the photo gallery, explore our temple services, or view the temple kodimaram product page.
Plan your kodimaram installation with us
Share your temple or church details, the tantri’s measurements and your muhurtham. Our team will prepare a clear plan for crafting and installation.
 Kodimaram
 Kodimaram
 Kodimaram
 Kodimaram